Baby tomatoes

Baby tomatoes
Showing posts with label eat the world. Show all posts

Friday, August 7, 2015

Eat The World- Shannon's Take on Spicy Asian Chicken

If you're a home food preserver like I am you are well aware that canning is not cooking, and generally speaking, you can foods that are ingredients, not composed dishes, right? There are a few exceptions, like soups and some stews, but for the most part I find myself canning a lot of vegetables, pickled foods, relish type foods, and the like. The reality is I prefer this way over a cupboard full of soups and ready to eat meals- they are not as versatile as a cupboard filled with ingredients!

With so many relish and pepper things canned many people wonder what in the world to do with these foods later. Pepper jellies are often poured over a block of cream cheese and served as a spread for crackers, or melted and uses as a baste or glaze for roasting meats. Relishes are added to sandwiches, dips and cheese plates. Hot pepper sauces and salsa add fire to all kinds of foods. Cowboy Candy, or candied jalapenos, is one of those foods so many people ask "Well, what am I supposed to do with this?"

Get the recipe for Cowboy Candy by clicking HERE.

Don't let "candy" fool you- there is a sweet note but these little jewels still pack a punch, especially the leftover juice when you've fished out all the pepper slices. This leftover liquid is an unexpected bonus- you get a slightly sticky, slightly sweet and nicely hot liquid to perk up all kinds of dishes. 


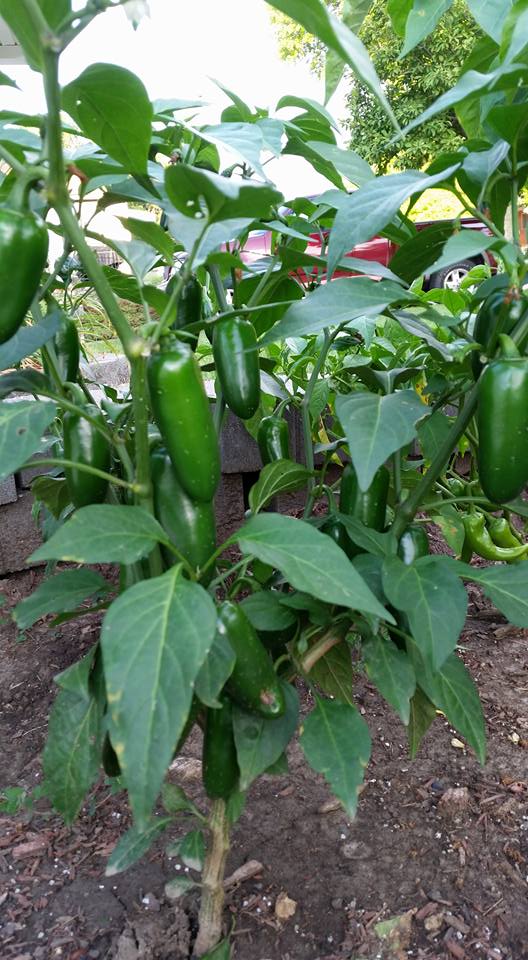
Picture from Paul Quick
So where do you get the leftover syrup? Well, a couple of ways. Often when you make a recipe like this for home canning you find you have excess brine (I always have leftover- especially when making pickles). You can pour the extra liquid from Cowboy Candy into extra canning jars and process along with the other jars for shelf stability or just pop in the fridge. Because the peppers get simmered in the brine for a few minutes before packing into jars it does have some of the heat infused already. You also will have leftover, and usually hotter, liquid left after you have fished out the sliced peppers and ate them. Save this as well! The flavor is incredible.

It's so useful. You can cook it to reduce it and get a syrupy sweet and hot drizzle or dipping sauce, a great way to jazz up purchased salad dressings. It makes a great marinade, an add-in to barbeque sauce, a great way to perk up fridge pickles or store bought pickles, and turns Asian style foods into something extra wonderful.

This is where Shannon comes in. Shannon Goudy lives in Florida and enjoys home food preserving as much as I do. She is a regular contributor in a Facebook canning group we both belong to and often posts recipes, loads of pictures and great hints- including her take on a sweet hot Asian chicken dish that you are going to LOVE. Shannon came up with this recipe and called it Triple "S" Threat Chicken- sticky, spicy and sweet- and I agree!! 


Shannon's Triple "S" Threat Chicken

Sauce:
1 1/2 cups Cowboy Candy Syrup
1 teaspoon ginger
2 teaspoons soy sauce
1/4 cup cold water
2 tablespoons cornstarch

Chicken:
4 large chicken breasts
2 cups all purpose flour
1/2 cup cornstarch
1 teaspoon ground ginger
1 teaspoon salt
1/2 teaspoon garlic powder
4 large eggs
Oil for frying (Shannon prefers peanut oil)

To make the sauce, combine the Cowboy Candy syrup, ginger and soy sauce in a medium saucepan. Mix the cold water and cornstarch together until the cornstarch is fully dissolved then add to the syrup mixture. Whisk together and cook over medium heat until thickened. Set aside.

For the chicken, start by beating the eggs in a large bowl and set aside. In a separate bowl, mix together the flour, cornstarch, ginger, garlic and salt. Set aside.

Cut the chicken into bite sized cubes. Working on small batches, dip the chicken in the egg to coat, then in the flour mixture. Fry in the hot oil until golden brown and cooked through. Drain on paper towels and keep warm until all chicken has been fried.

Toss the chicken with some of the sauce- just enough to coat, and serve over jasmine, basmati or long grain rice, and sprinkle with some Cowboy Candy. Serves 4 to 6.

Doesn't this sound KILLER? I am definitely making this as soon as I restock my Cowboy Candy stash. A side of stir fried veggies and this is better than any takeout I can imagine. 

Shannon gets her cooking chops from her hobbies- like me, she is a cookbook reader. Yep, cover to cover just like me. She, also just like me, watches cooking shows like some people watch sports, with Food Network personalities Robert Irvine, from Restaurant Impossible, Dinner Impossible, and more,  and Ree Drummond, the Pioneer Woman, among her favorites. She gets some professional kitchen experience working for her uncle- she prepares lunch every day for the entire staff of her uncle's business, about twenty people, including all the planning, shopping and budgeting.

The country lifestyle in northwest Florida is something Shannon really thrives in- stopping at farm stands for produce and local dairy products, and I'm sure all that beautiful produce is featured i many dishes from her kitchen. She really loves all things Asian- Chinese, Japanese, Thai, Indian, and those veggies are vital to amazing Asian foods. 

Besides cooking, Shannon is a big animal lover, and loves spending time wherever there is water, be it the beach, river, spring or pool!

Disclosure of Material Connection: I have not received any compensation for writing this post. I have no material connection to the brands, products, or services that I mentioned. I am disclosing this in accordance with the Federal Trade Commission's 16 CFR, Part 55: "Guides Concerning the Use of Endorsements and Testimonials in Advertising."

Sunday, June 21, 2015

Product Review: When It's Too Hot To Cook (Much)


It's been a few months now since I have been making that daily commute back to the city for work. It's been great getting back into the swing of things, and I am really enjoying being part of a big company again. I don't miss the teeny tiny three person office environment one bit. I'm very lucky to be working where I do. The company is very focused on maintaining a happy environment for the employees and we have loads of social activities like barbecues, contests, community volunteering opportunities and so much more. The company brings food trucks onto the campus every week so we don't have to go far for lunch and have a rotating lineup of options. 


Just this past week the company announced they would be hosting a weekly farmers market on the campus. I was so excited to hear this! That has been the one thing I did miss about my previous job- having access to our small ton farmers market, and even participating as a vendor. Now I don't have to worry about missing out on garden fresh vegetables that I can't or don't grow at home. I can stroll over to the market before getting in my car and heading home.


In my office we do a weekly lunch sign-up for fun. Every Wednesday one or two people volunteer to bring lunch for our team. There are twelve of us, so it's not a HUGE endeavor or a full scale catering event by any means, but just a fun way to be social and try some new foods. During the most recent Wednesday lunch one of my coworkers brought in a salad- Asian flavors with crunchy veggies and crispy wonton strips. Really really good. Reminded me of an old church cookbook recipe I used to make using bagged coleslaw mix and uncooked crushed ramen noodles, but it wasn't exactly the same. She shared her secret "recipe"- it IS a bagged salad, a complete salad kit she picked up at the grocery store, and it was so delicious I thought it would be great to use as a starting point for summer meal in one salads on these hot hot hot no-cooking days!


The Dole Chopped Salad Kit is such a great idea. I chose the Asian Sesame variety, the same as the one my coworker brought to lunch. Everything you need is in this one bag- the salad greens including kale, shredded carrots, sliced almonds, those crunchy wonton strips and Sesame Ginger Vinaigrette.
  

I am dressing mine up with some fresh additions. Chopped scallions, because I happen to have them on hand, and some julienned baby bok choy are going in the bowl. 

Baby bok choy is has a crisp crunch and great flavor
Because I am serving this salad for dinner I thought it would be nice to get a source of protein in there as well, so I am pan-grilling some shrimp, which have been seasoned with Feiny's Chesapeake Bay Rub, and quickly seared in a wok. They literally cook in a minute or two so I am in and out of the kitchen super fast and they are delicious and perfect with the Asian flavors in the salad. 


The shrimp were juicy and delicious with just a hint
of caramelization from the hot skillet or wok
Dinner prep went super fast. I bought shrimp with the peels intact so I had to take a few minutes to peel them and pull off the tails before tossing with the Chesapeake Bay Rub and that was the most difficult part of "cooking." I wish I had grabbed a cucumber because that would have been a great addition to this salad, so would water chestnuts! It took just seconds to toss the veggies in a large bowl with the dressing and extras, plate up a serving and top with some of the shrimp. Done!

Yes, that IS an autograph on the package- because I am a
dork like that. Actually, Adam hand-packages his rubs and
sends them out as ordered so you always get a freshly
mixed batch. 
You can find this salad kit at just about any large grocery store. Of course I picked it up shopping in the city after work, it's not available out here in our teeny grocery store. You definitely want to get yourself some Chesapeake Bay Rub too- get that by clicking HERE.

Disclosure of Material Connection: I have not received any compensation for writing this post. I have no material connection to the brands, products, or services that I mentioned. I am disclosing this in accordance with the Federal Trade Commission's 16 CFR, Part 55: "Guides Concerning the Use of Endorsements and Testimonials in Advertising."

Monday, March 2, 2015

My Backyard Chicken Dreams- Roasted with Lemon and Thyme

As much as we love living at the lake, there is one thing missing from the perfect country life. Chickens. I have always wanted chickens. Not a huge mega factory farm barn full. Beautiful, colorful chickens, that roam freely around the yard, eating whatever chickens eat, loving the sunshine and fresh air, and if I am really lucky, rewarding me with a few eggs.

photo by Tracy Carlson
Darn rules! We have rules here, and the meanest one is No Chickens. Talk about crushing a girl's dreams! Instead I have to live vicariously through my friends' chickens, buy eggs from a local farmer- whose chickens roam around freely just like mine would do if I had any- and oooh and awww over pictures of beautiful chickens on Facebook. It's been a tough thing to accept, especially since even in the city people are allowed to keep chickens and the one thing I REALLY really wanted in the country wash a happy flock of lovely chickens. Surely a couple happy hens wouldn't be a bother the neighbors, right? I'm pretty sure I wouldn't want a rooster hanging around waking me up everyday. Visiting the county fairs last summer I got to see some of the show chickens, and they are absolutely beautiful birds. It would make my heart happy for have a few girls milling about the yard, pecking around on the deck, rooting through the potted plants, chomping on the marigolds, chatting up a storm with us. 

photo by Kristi Worthington
Years ago I lived in England. Everyone had chickens. Seriously- everyone. Every yard in the town I lived in was fenced and in the backyard people had long dog run type enclosures for their chickens with the cutest chicken houses. They looked like great big dollhouses- fancy Victorians, castles, mansions- just for the chickens. The hens roamed all over the yard during the day and were tucked safely into their enclosures for the overnights. Why? Apparently the British family appreciated having fresh eggs every day. Unlike here in the U.S., there we did not keep dozens of eggs on hand in the fridge. Eggs are purchased in packs of 6 and kept at room temperature in a bowl of water. They don't spoil, so the British housewife knows something we don't here in Iowa. But I just really wanted some beautiful chickens with that adorable chicken house.

Suzanne Ledford's chickens
provide plenty of eggs
In spite of all this chicken love and longing, I do enjoy eating chicken. Roast chicken, in particular, and I have found that roasting pieces is much quicker than waiting on a whole bird, and just as delicious, and possibly juicier too. I have found that the trick to perfectly moist roast chicken is to choose pieces instead of the whole bird, place them in a baking dish, dot with butter and add a little wine, fruit juice or chicken stock to the pan- cover loosely with foil for part of the roasting time, and don't be stingy with the herbs. Thyme is a natural with chicken, but sage and rosemary also are delicious.

This chicken is roasted with loads of chunks of fresh lemon- and believe me, the lemon flavor you get is amazing. The lemon chunks break down during roasting and baste the chicken with delicious juice, enhanced by the thyme, and leaves you with plenty of pan drippings for a fabulous gravy or jus for drizzling. Serve with roasted potatoes, carrots and lots of crusty bread for sopping up the sauce.

Roasted Lemon Chicken

about 2 lbs chicken pieces
2 lemons, cut in chunks
several sprigs fresh thyme
garlic cloves (whole)
3/4 cup Sauvignon Blanc
drizzle with olive oil

Heat the oven to 350 degrees.


Place the chicken pieces in a roasting pan or casserole dish. Season with salt and pepper.

Note- I also used a little Feiny's Citrus Barbeque Rub.

Scrub the lemons well and cut into quarters lengthwise; thence crosswise into chunks. Sprinkle the lemon chunks over the chicken pieces in the roasting pan. Strip the leaves off the thyme sprigs and sprinkle over the chicken pieces.


Peel and lightly smash about 10 or 15 cloves garlic. Sprinkle them over the chicken. Pour the wine in the roasting pan. Drizzle with a couple tablespoons of olive oil. Cover loosely with foil and roast for about 30 minutes. Remove the foil and continue roasting the chicken for about 45 minutes, until nicely browned.


Remove chicken pieces to serving plate. Strain juices in the pan; serve with the chicken. If you like more of a gravy rather than jus, pour the drippings into a saucepan, add a cup or two of chicken broth and thicken with roux or a cornstarch slurry.

Saturday, September 6, 2014

Canning Cookbook- Pizza Sauce

Breaking out the big roaster! It's time to make pizza sauce!


Our first trip to the Amish farm was a pretty good trip. About 10 pounds of gypsy peppers and 40 pounds of tomatoes makes a nice start to the busiest time in my canning season. The majority of those gypsy peppers was diced up and put in the dehydrator to save for cooking throughout the cold winter months. I had other plans for those tomatoes.


Just a couple hours of prep time- quarter the tomatoes, squoosh out the seeds, cut out any bad spots- buzz in the food processor until smooth (yes, skin and all. Save that fiber and vitamin-rich skin) and pour into the roaster.


We make a few pizzas every once in a while at the Little Lake House, and a while back we got to sample some Habanero Pizza Sauce from a company called FireFood. I have been wracking my brain ever since trying to duplicate this recipe. I know enough about hot peppers to know to use caution. But I figure 40 pounds of tomatoes and 3 Habaneros should be a balanced mixture. So....with that in mind, let's start to work on a recipe. So far I have used-

40 lbs tomatoes (unpeeled)
1 medium onion
4 bell peppers (any color)
10 cloves garlic
3 fresh Habanero peppers IF DESIRED (We will talk about alternatives later)


Wash, core and quarter the tomatoes. Use your fingers to remove as many seeds as possible and place in large bowl. Clean and quarter the onion and bell peppers. Remove stems from Habanero peppers (and as many seeds as you desire). Process vegetables in food processor in small batches and pour into large electric roaster. Note: I did not peel my tomatoes. Buzzing in the food processor very finely chops the skin and makes them barely noticeable. You CAN blanch and remove the skins if you desire.


Pour all the pureed veggies into a large roaster and set on 300 degrees.


Cook, stirring often, until reduced by half. Add a couple tablespoons salt, a few grinds of black pepper and anywhere from 1/2 cup to 1 cup sugar during cooking. Taste often. 

About the peppers- if you didn't use fresh Habaneros you can add crushed dried hot peppers such as cayenne to taste. USE CAUTION. Mixture will probably reduce by half so the heat may intensify!! Remember, you can always add Tabasco sauce at the end if you need to.


I am letting mine cook overnight but will turn it way down for the sleeping hours and turn it back up in the morning. Cooking tomato puree in a roaster is a very easy way to get perfect results without worrying about watching a pot on the stove or scorching the bottom if you don't stir often enough. 

The next morning I turn the heat back up to about 275-300 and let it keep cooking. I check it every hour or so and give it a stir to make sure nothing is sticking and it's cooking down evenly. At this point there is nothing in the roaster but the vegetables- no herbs at all. It would be pointless right now to add a bunch of herbs and cook it down so much you've cooked the herb flavors right out.


By early evening the sauce has cooked down to half it's original volume. I don't need this giant roaster anymore (it takes up a lot of counter space) so I shut it down and let it cool off for half an hour or so, then bring out my big crock pot. I recommend transferring the tomato sauce with a ladle. Not the quickest way but it's much less messy and you don't splash hot tomato sauce everywhere.


NOW is the time I start adding my seasonings. I grow all my own herbs so I make my own Italian blend containing basil, parsley, thyme and marjoram. You can use a store bought blend like Italian Seasoning- that will work just fine. You're going to need up to one cup of dried seasoning by the time you're done. Stir about 1/3 cup or so of the dried seasoning into the tomatoes in the crock pot and continue to let it just cook and do it's thing.Why dried seasoning? Fresh herbs are very delicate and they lend a fresh herbal flavor at the END of cooking. Since this is a canning recipe you want to avoid adding fresh herbs because they may interfere with the acid balance and make the recipe possibly unsafe, and processing in a canner will just wipe out their freshness. Always go with dry herbs in a canning recipe.


So after another night of slowly cooking and reducing, we now have a rich and thick tomatoey pizza sauce. It's time to add the rest of the herbs and let that simmer for about an hour, while I get my canner and jars ready to go. Right before adding to jars, add 1/4 cup lemon juice to the sauce (you MUST acidify tomatoes when canning) and stir well. Pour the sauce into pint jars, wipe the rims, fix lids and rings and place in a boiling water canner. Process for 35 minutes, remove jars and let rest for 24 hours before checking seal and removing rings. My crock pot full of delish yielded 7 1/2 pints spicy pizza sauce.


Next step- make pizza !!!

Tuesday, September 2, 2014

Update #2 on the New German Adventure

Let me start off by planting some music in your brain- you know the kind of tune that played on The Price is Right when the contestant lost and over-guessed the price of things?  That whomp....whomp...whoooooomp thing? Ya, play that in your head for a few minutes. 

I am obviously not going to be a kraut maker, and I'm perfectly ok with that. It was just an experiment in "Can I Do This?" anyway, and I'm not a huge kraut fan to begin with. So no tears of disappointment and fits of frustration will happen here. Just a stinky pot of "stuff" to dispose of.

As I discovered while making a wellness check, I had not a pot of kraut fermenting, but something that looked like it belongs in Alexander Fleming's lab- a pot of mold. Weird mold. Curly, bendy, ruffly moldy in colors I never knew existed, and no, I didn't take any pictures. Gross.

Sir Alexander Fleming, playing with nasty and
disgusting stuff in his lab. Photo courtesy of
Wikimedia.
Out the back door and off to the compost pile with that nonsense. And now........off to the farm for some vegetables I actually know what to do with!!

Wednesday, August 20, 2014

Dinner from the garden

What a terrible thing it is- to be able to step out in the yard, pick an armful of fresh veggies and make dinner happen. Just terrible. Especially right now, with all the tomatoes, zucchini, herbs, onions, garlic...... just awful.

Tonight we're having dinner from our garden! Fresh yellow summer squash, zucchini, tomatoes, onions- the only thing we didn't grow was the hamburger and Parmesan cheese. This is a quick to put together dish, pop it in the oven and relax for 20 minutes or so, then get some pasta water going, toss in some pasta to go alongside and voila! Dinner is served.


Italian Stuffed Summer Squash
  • 1 medium yellow summer squash or zucchini
  • 1/2 medium red onion, chopped
  • 4 cloves garlic, chopped
  • big pinch crushed red pepper
  • 2-3 tb minced fresh marjoram, basil, oregano or a combo
  • oil
  • 1 lb hamburger
  • 2 cups tomato sauce or puree
Wash squash well and cut in half lengthwise. Scoop out seeds and discard. Also scoop out some of the flesh leaving a half inch shell. Chop squash flesh.

In large oven-safe skillet heat a couple TB oil. Add onion, garlic and chopped squash. Saute for 1-2 minutes. Crumble ground beef into skillet. Cook and stir until beef is cooked. Add herbs and pepper. Add half the tomato sauce to skillet, then stuff the squash halves with mixture. Add all remaining sauce to skillet, stir, and nestle the squash in the mixture. Sprinkle with topping mixture (see below). Place in 425 degree oven about 20-30 minutes until squash is tender but not mushy.


Remove carefully to plates, cut in half if you like, and serve with pasta and extra sauce.


Topping-
  • 1/4 cup panko
  • 1/4 cup Parmesan cheese
  • pinch of herbs used in dish
Combine in small bowl. Sprinkle over squash. Drizzle with a tiny touch of oil. The topping bakes up crunchy from the panko and salty from the Parmesan cheese and makes the perfect textural element. 

You'll notice I did not precook my squash before stuffing. I prefer mine to still have some hint of crisp to it, but you can certainly precook yours if you like it softer. Put on a microwave safe plate,sprinkle with a few drops of water and cover tightly with plastic wrap- cook for a minute or two until barely tender.

All you need now is a hunk of crusty bread and a breezy spot on the patio to enjoy a perfect summertime dinner!

Friday, August 15, 2014

Canning Cookbook- Chinatown Plum Sauce

Ohhhhhhh I have been waiting a year to be able to make this sauce! Ever since hitting the jackpot- finally, after 2 years of searching the Iowa countryside, I finally found wild plums last summer. So now that I know where all the trees are, I just needed to get through winter, spring and summer again and voila! Plums! I have been wanting to make an Asian plum sauce. Why a plum sauce? Iowa's native wild plums ripen to a gorgeous ruby red and become juicy and sweet like other plums but they are TINY- and that makes it hard to do much with them other than sauces and jams. I have a huge stockpile of jam already so, plum sauce it is!

Just the other day they were green!!
I love learning new techniques and new styles of cooking and Asian foods is definitely a weak spot. Maybe the perfect plum sauce will inspire me to explore Asian recipes and sharpen up my skills! Anyway, let's round up some plums and make this sauce. I am using Iowa wild plums but you can use any plum you like, you just need 10 cups pitted and chopped. Peel the plums if you like, I didn't- they break down well in cooking. You will need-
  • 10 cups chopped, pitted plums, peeled if desired
  • 2 cups packed brown sugar
  • 1 cup regular sugar
  • 1 cup apple cider vinegar
  • 1/2 medium onion, finely minced
  • 2 cloves garlic, finely minced
  • 2 tb finely minced/shredded gingerroot or 1 tb dried ground
  • 3 tb crushed red pepper
  • 1 tb salt
In crockpot, combine plums with all other ingredients. Cover and set to high. When boiling, turn heat to low and cook several hours until thickened. 

Since it's VERY early in the wild plum season, I had to
supplement with store bought plums, cut up.
To get the perfect smooth sauce, buzz in a blender or food processor for a few seconds. Reheat if necessary.

Red onion, freshly garlic and spicy ginger make the sauce pop!
Ladle hot sauce into half pint or pint jars leaving half inch headspace. Wipe rim, fix lids and rings. Process in boiling water bath for ten minutes. Remove and cool, check for seals after about 12 hours.


This sauce makes an awesome dipping sauce for egg rolls or a great base for a stir fry sauce. You can tame the heat by using a little less crushed red pepper if you like. It's also great for tossing with chicken wings for a Asian take on wings. Depending on the plums you choose you will get a beautiful sauce anywhere from golden yellow to deep purple. 

Hurry up and ripen guys!! I have plans for you!
This recipe is safe for home canning- it's very similar to the recipe featured by Bernardin in Canada. The only differences are in seasonings, the acid is still in there. Safety should always be on the forefront of your mind as a home canner. The internet can be a scary place when it comes to canning recipes with a lot of people touting outdated and unsafe methods. Please check a reputable source before trying a recipe if you're not sure if it's safe.


Wednesday, July 23, 2014

A new German adventure !

Ok, I have decided. I am taking the plunge. I am going to master this. I've decided it's time that I start to embrace some of the foods I think I don't like (there aren't very many by the way) and try them, and even better, learn to prepare them. So armed with loads of info from some very experienced people to guide me, I am embarking on a new adventure. A German one. A stinky one. I am going to make sauerkraut.

What's the big deal you ask? I have been convinced most of my life that I don't like sauerkraut. To be perfectly honestly, I never really did. Having a mother who was born and raised in Germany meant more than my fair share of sauerkraut on the dinner table, and with the exception of oysters, if Mom made it, we ate it or went hungry. Lots of celebrations at the German American Society meant.....more kraut. An entire summer spent in Europe.....more kraut. When I reached adulthood I swore I'd never cook any of those foods, the ones I was forced to eat as a kid- turnips, kohlrabi, rutabaga........sauerkraut!

I am very fortunate to have so many experienced canners, preservers, and homesteaders as friends. Most of not all of them have some experience with fermenting kraut, and since I'm a total newbie, I need the advice! After spending a lot of time talking with several people I feel like I can do this- and it's much easier than I ever imagined it would be. Two ingredients- cabbage and salt. The amount of cabbage is up to me. Since I have zero experience, I am definitely starting SMALL- using a good size head of cabbage and a small bucket. I'm thinking a few quarts of finished kraut will be a success if this novice can pull it off. 

The process is simple. Slice the cabbage finely. Obviously, the actual size is up to you. You don't want big HUNKS but you also don't want thread-like shreds. You can use whatever method of slicing you like. My friend Ben advised me to not cut it TOO small but to get a good chop on it. I can see why- adding the salt will release the juice from the cabbage, which is what forms the brine. The more cut surfaces, the more brine will be made faster. The Ball Book recipe for kraut uses about 25 lbs (5 heads) and one cup salt. I am planning on about a head to start my small experiment so I will need to do some math with the salt. Too much salt, I'm told, will prevent fermentation, and I'm sure won't taste very good. 

Once the cabbage is sliced, you need to layer it in the CLEAN container you plan to use for fermentation, alternating with salt and using hands, work the salt into the cabbage well, massaging it, crushing it a little, to help break it down and get the juices going. If you get this step right you will have enough brine to cover the cabbage completely. Ball has a brine recipe on their website if you don't get enough from the cabbage. Then weigh the cabbage down with a plate to keep it submerged, cover with a towel to keep multi-legged friends and junk out and place in a 70-75 degree area and let nature do it's thing. It should take a few weeks for the process to finish, and you'll know when it stops bubbling. Skim off any scum as it forms. 


You can do a few things to make your kraut a little different. You can add caraway seeds or juniper berries for a different flavor. You can use white or red cabbage- pink kraut- that's an interesting idea. I didn't do any of these things this time. For me it was a learning experience and I'll try those other ideas later. 

After it's been fermented you can either can it (it's a waterbath canning item so it's easy) or just store in the fridge. It stores well in the fridge for a very very very very long time.


So, now I have my cabbage brined and covered and ready to do its thing. You'll have to stop back by in a few weeks and see how it turns out.