Baby tomatoes

Baby tomatoes
Showing posts with label food in jars. Show all posts

Wednesday, September 30, 2015

Canning Cookbook- Caramel Apple Pie Filling

It's officially apple season in Iowa. All over the state families pack up the kids and head to the many apple orchards that are sprinkled around the countryside. Breezy cool fall days are the perfect time to grab a pole picker and head out to the orchard to pick your own apples, or stroll through the pumpkin patches that often accompany the apple trees. Grab some apple cider donuts or gourmet caramel apples and fudge, some hot spiced cider and celebrate fall!


Sherry Chapin Block picked this bounty
Not too far from where I live is Burr Oak Farms. Located near Winterset in Madison County, Iowa, Burr Oak is the kind of place I'd love to have all my own. They are a very young orchard, so while they do have 55 varieties of apples, as well as other fruit trees, they do have limited quantities at times. The apples they grow include a number of heirloom or antique varieties, including Grimes Golden, Newtown Pippen, Delicious, Arkansas Black, Empire, Early Harvest, Cameo, Gala and Honeycrisp. They also have yellow and white peaches such as Indian Cling, Alberta and Bell of Georgia, Bartlett and Keifer pears, plums, nectarines, apricots, sweet and sour cherries and blackberries.

Burr Oak Farms is open from June to mid-November.

Over the years my family has spent a lot of time at Center Grove Orchard. When we first started going there, it was little more than a very sparsely stocked store, a pumpkin patch and some apple trees. NOW it's a full-on family adventure spot with all kinds of animals, activities, a corn maze, hay rack rides, lots of great food options and of course, the orchard shop with apples, pies, freshly made treats like caramel apples, fudge and apple cider donuts. 

2015 is a great year for apples- the trees are loaded!
We love to go for the apples, but the grand kiddos love the animals, the corn pool, the Three Little Pigs' houses, the jumping pillow, giant slide- there is so much to do now.

Of course the apples are still fantastic. There are all kinds of varieties, for fresh eating and cooking/baking. The orchard currently has Paula Red, Gala, McIntosh, Cortland, Honeygold, Empire, Golden Supreme, Jonathan, Golden Delicious, Red Delicious, Jonagold, Idared, Lysgolden, Mutsu, Chieftain, Honeycrisp, and Granny Smith. Don't forget the pumpkins and all kinds of cute gourds for fall decorating. 

Center Grove Orchard is located near Cambridge, Iowa, in Story County. Just east of Interstate 35, it's easy to find and has lots of parking. They are open starting Labor Day weekend through Christmas.

North of The Little Lake House, in Greene County, is Deal's Orchard, near Jefferson. Like many other apple orchards, they have loads of family activities, a petting zoo, and a fantastic orchard shop with all kinds of delicious Iowa food products, apple items like pies, apple butter, and they even make their own cider and hard cider!

In the autumn I love visiting Deal's Orchard because they also have a fantastic selection of winter squash and pumpkins. As a home canner I love stocking up on winter squash such as butternut and Hubbard, and pie pumpkins. You just can't beat fresh squash for making amazing pies, and Deal's is always ready to give you a great price. 

I see a pie or six in my future.
Sometimes I really like a little road trip. Doesn't have to be a long drive, no need for a hotel. Hop in the car, and head over a couple counties to check out Three Bee Farms. Just off Highway 92 in Pottawattamie County, in Griswold, Three Bee Farms is not just an orchard it's a honey producing farm with honey bee educational programs and an observation hive.

The store at the farm features all kinds of honey and beeswax products and candles and all my farm store favorites- fresh produce, autumn produce like pumpkins, gourds and squash, apples, popcorn and more. Like many other orchard/farm destinations there is something for everyone in the family and offers group tours and activities.

In the Apple House Store you can choose from pre-picked apples including Lodi, Summer Treat, Zestar, Paula Red, Earliblaze, Lura Red, Gala, Early Jonathan, Jonafree, Jonathan, Ozark Gold, Jonadel, McIntosh, Jonagold, Macoun, Harelson, Grimes Golden, Red Delicious, Golden Delicious, Cheiftain, Secor, Edgewood, Arkansas Black and Idared, or you can head out into the orchard and pick your own. They also have raspberries, cherries and pears.


Cindy Davis' pie filling.
With this abundance of beautiful apples it can be hard to decide what to make with them. Apple pie is a given, and so is German Apple Cake- one of my family's favorite desserts. We are also big big fans of crunchy oaty apple crisp, topped with lightly sweetened whipped cream- so decadent and so appropriate for autumn. I mentioned apple pie and naturally, when looking for ways to can apples and preserve this taste of fall for the cold winter season, a lot of home canners look to pie filling. While I am not typically a pie filling fan, preferring instead to make pies with freshly sliced fruit, tossed with sugar and spices and piled in a flaky crust, having pie filling on hand makes super quick desserts. You can use it not only to make pies but as a topping for cheesecakes or ice cream, or a filling for crepes and other desserts. 

When you really want to be decadent, you add a little booze, right? My version of pie filling contains a little hint of rum with the spices and brown sugar to give it a caramelly delicious flavor that's so much better than the stuff in a can. The extra kick of rum also turns your apple pie and apple crisp into something really special- after spreading the fruit filling in your pastry shell or baking pan sprinkle it with cubes of cold butter before topping with pastry or the crumb topping for a Butter Rum Apple Pie or Apple Crisp that will be a new favorite for your family too. You can substitute rum extract instead of the booze if you prefer.


Pie filling made by Patty McDaniel Reyling
One more note- this canning recipe uses a product called ClearJel or Permaflo. You can find this modified starch at Amish markets or online at Amazon. DO NOT substitute cornstarch or other conventional thickener in a canning recipe. If you can't find it, you can also can the filling unthickened and use cornstarch to thicken immediately before using it.

Apple Pie Filling with Rum

25 cups peeled, cored and sliced apples 

10 cups apple juice
5 1/2 cups packed dark brown sugar
1 tablespoon ground cinnamon
2 teaspoons ground nutmeg
1 teaspoon ground cloves
1 1/4 cups lemon juice
1 3/4 cups ClearJel
1/2 cup rum

Peel, core and slice the apples, adding to a large bowl of water with lemon juice added to prevent browning. When all apples are ready bring a large pot of water to boil. Add batches of apple slices and poach for about 1-2 minutes; remove with slotted spoon to large pan. Cover and keep warm.


In large stockpot whisk together the apple juice, sugar, spices, and ClearJel. Heat until thick, whisking often to prevent lumps. Whisk in the lemon juice and rum. Fold in the apple slices. 


Always adjust your processing time for your altitude
Ladle the hot filling into hot quart canning jars. Remove air bubbles, wipe rim and fix lids and rings. Process in a boiling water bath for 25 minutes. Allow jars to cool 12 to 24 hours before removing rings and checking seals.


A final note about apples- make sure you choose an apple variety that is suitable for baking, like Granny Smith or Braeburn. Most fresh eating apples will break apart during cooking and processing and don't work well in pies or pie fillings. 

Now that you've got the pie filling tucked away on the shelf, you have some delicious homemade desserts on hand in minutes. Just pop the top off a jar of your own homemade, and boozy, apple pie filling and use your imagination.

NOTE: This recipe has been adapted from a recipe shared on www.foodpreserving.comFor more home canning information including complete canning directions and hints, visit the NCHFP website.

Tuesday, September 15, 2015

Canning Cookbook- Getting A Head Start On Soup Season

The calendar still says summer but we all know it will be autumn and then, yay! winter shortly thereafter, and that means SOUP SEASON! Chili, lentil soup, hearty vegetable beef, and chicken noodle when you're under the weather, cooler weather definitely calls for a steamy warm bowl of soup.

Here in Iowa it is Corn Country. Sweet corn is plentiful at the end of summer and when you've had your fill of corn on the cob it's time to start looking for ways to use it. Soup fits the bill perfectly. Corn chowder is pretty popular and this version adds hearty potato, chunks of chicken and a hint of heat with peppers to amp up the flavor and fill your belly with homemade goodness. Chowders are creamy soups, but we don't can dairy products at home, so swirl in some heavy cream when you're heating this up and enjoy with a wedge of cornbread or a nice hunk of crusty bread.


To make Iowa Corn and Chicken Chowder, you will need-
  • 8 cups corn
  • 4 cups cubed cooked chicken
  • 4 cups cubed potatoes (red skinned potatoes are best)
  • 2 cups diced green chilies *See Note
  • 1 large onion, chopped
  • 12 slices bacon, diced and cooked
  • chicken broth or stock, heated to boiling
Using clean, hot pint jars, equally divide all the ingredients among the jars. Fill jars to 1 inch head space with heated chicken broth. Clean rim of jars completely, fix lids and rings, place in pressure canner. 

Following your canner's directions, process for 75 minutes for pints, at the correct weight for your altitude.


When you get ready to serve, add 1/4 to 1/2 cup heavy cream to each pint.

*Note- Now, let's talk about those chilies. This is where you make this soup as spicy or as mild as you like it. I will be using jalapenos or serranos for my soup because that's what's in my garden. I'll mix my hot peppers with mild bell peppers to equal 2 cups. You can also add a shake or so of dried cayenne pepper if you like, or a drop or two of hot sauce before canning or after reheating later.

This soup is a wonderful way to use up leftover roast chicken or turkey. You can use fresh corn cut off the cob or frozen whole kernel corn (thaw first!!) to make it easy. I prefer red skinned potatoes over russets because of their waxy texture- they don't fall apart as much as russets and work better in processing. Also, I prefer NOT to peel them, which some people consider a no no in canning, but I scrub them very very thoroughly- it adds the necessary heartiness to the soup. One final hint- wide mouth jars are great for canning soups because you don't have to struggle to get the food out. 

I think a nice fat wedge of cornbread would be perfect with this soup, with a crispy tossed salad and a wedge of warm pie for dessert- we're talking total comfort food here. Try it!!

And speaking of soup, it's time to start thinking about vegetable soup, chili, chicken soup (add the noodles before serving) and all the other ones we love so much on a cold, blustery day. What are some of your favorites?

NOTE: This recipe has not been tested by the NCHFP. If you are not comfortable canning untested recipes, please do not use this one. For home canning information, visit the NCHFP website.

Monday, August 24, 2015

Canning Cookbook- Wild Plum Jelly

A drive in the Iowa countryside in the early spring is a beautiful thing. Wild flowers are abundant in the roadside ditches and farm fields. Day lilies bloom in huge clusters all along gravel roads. Dandelions smile in the sunshine. Many country roads are bordered with row after row of bushes covered in pristine white blossoms. The blooms are teeny tiny and smell sweet. Before too much longer these same bushes will be covered in little red wild plums no bigger than an olive. 


These miniature fruits are a real treasure. They are sweet and juicy, just like their full-sized counterparts, and make amazing jams, jellies and sauces. When I was a little girl my dad used to load my sister and I in the car and we'd head out into the country to pick wild plums along the roadsides. Sometimes we'd bring home boxes full of them.

These plums are really very tiny. They truly are about olive size with a fairly large pit for their size. They aren't the easiest thing to eat fresh but they are very sweet and juicy. I found the  best way to use them is to cook them whole, and strain out the pits. The skin usually cooks down and pretty much dissolves, leaving a beautiful rosy color. They are a freestone fruit so the flesh of the plum doesn't cling to the stone.  

To make this recipe you need roughly a gallon of wild plums. You can cook with the pits in (you'll be straining anyway) or pit the plums beforehand- it's up to you. I don't pit them first- too much work! After sorting out the bad ones and cooking them, straining and discarding the pits you'll have anywhere from 6 to 10 cups of liquid, depending on the juiciness of the plums. To make the juice wash the plums well and remove any stems. Discard any that might be buggy. Place in a large stockpot and add enough water to cover the plums. Bring this mixture to a boil over high heat, stirring constantly. Reduce heat and simmer 30 to 45 minutes until the plums have broken down completely.

Line a colander with two layers of cheesecloth (or use a jelly bag) and place over a large bowl. Ladle the plum mixture into the colander. Allow the juice to drain off into the bowl overnight (in the fridge). Discard the plum pulp (add it to your compost pile if you have one) and your juice is ready to use. Let's make some wild plum jelly!

Wild Plum Jelly

5 1/2 cups wild plum juice
2 cups water
1 box powdered pectin
71/2 cups sugar

Prepare a boiling water bath canner, half pint jars and lids.

Measure 5 1/2 cups juice into stockpot. Add the pectin. Bring to a full rolling boil over high heat, stirring constantly. Add the sugar all at once; return to full rolling boil, stirring constantly. Boil for one minute. Remove from heat.

Ladle into hot jars to 1/4 inch headspace. Process in canner for 10 minutes.


NOTE: This recipe has not been tested by the NCHFP. If you are not comfortable canning untested recipes, please do not use this one.

Friday, August 14, 2015

Canning Cookbook- Jalapeno Hot Dog Relish

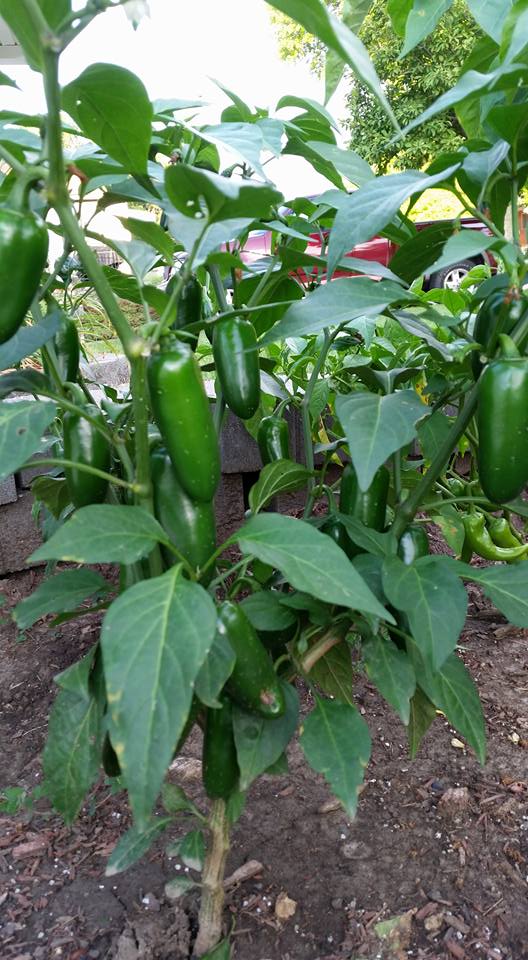
This summer at The Little Lake House we included several different hot pepper varieties in the garden. Not only do we love spicy foods but so do many of our friends and we love sharing our spicy goodies. Hot peppers have created some wonderful relishes, pickles and salsa around here, and a few experiments in mustard and hot sauce for chicken wings. 

Now while we do often grow many of the super hot peppers like ghost chilies and Trinidads, most of those are just too hot for the majority of our friends. Jalapenos and Serranos are very popular choices for spicy recipes that won't melt your face off quite as bad. Removing the seeds and webby membrane and you scale back the heat significantly, making jalapenos, especially, perfect for pickling, candying, adding to pickles and kicking up the impact of relish recipes.

While most peppers find their way into salsas I like to find creative ways to use them in recipes outside of the realm of spicy/hot/Mexican/salsa. Being a fairly new relish convert, just seemed natural to me that the peppers make their way into a relish recipe! This relish is really delicious and has loads of flavor- perfect for topping a grilled brat. Like most relishes, this recipe starts the night before, tossing the veggies with salt and chilling overnight to bring out the excess water. This step can be skipped if you are like me, and can't wait to get it in the jars.

Fresh from the garden cucumbers make the best relish

Spicy Pepper Pickle Relish

6 cups cucumber,  shredded or finely chopped
4 cups jalapeno, finely chopped*
4 red bell peppers, finely chopped
2 large red onions, finely chopped
2 tablespoons salt
2 1/2 cups apple cider vinegar
2 1/2 cups sugar
4 teaspoons celery seed
2 tablespoons mustard seed
2 tablespoons dried dill
2 teaspoons freshly ground black pepper

* Remove seeds and membranes to keep the heat level down.

Toss the vegetables with the salt in a large bowl. Cover and refrigerate overnight. The next day, rinse and drain thoroughly. Set aside.

In a large stockpot combine the remaining ingredients and bring to a boil, stirring to dissolve the sugar. Add the rinsed and drained vegetables. Return to boil and simmer for 10 minutes.

Pack the relish into hot canning jars to 1/2 inch headspace. Wipe the rims and fix lids and rings. Process in a boiling water bath canner for 10 minutes. Remove and allow to cool overnight before checking seals.

If this recipe sounds familiar to you, it should! It's a very close variation of my all time favorite zucchini relish, with different vegetables. The cucumber stays a little cruncher than zucchini and if you chop it instead of shredding it, you retain even more texture. That crunchier texture is the perfect topping for burgers, dogs, brats, sandwiches of all kinds. The jalapeno gives it a nice heat without being too mouth-melting.

Tuesday, August 11, 2015

Canning Cookbook- Gooseberry Jelly

Ever since finding them at the farmers market in town I have been obsessed with gooseberries. Not as common as they once were, these tart little jewels remind me of childhood when gooseberry pie seemed to be as common as cherry pie. We don't need a lot of whole pies at our house, so I'm always looking for new ways to use gooseberries that fits in our tiny family food needs. Jams and jellies are perfect. 


Making jelly is very easy. Once you've got the fruit juiced it's a piece of cake after. Of course you can do it old school and cook until you have reached the gel point, and not use pectin, but I find using pectin offers more flexibility. Inside the box of pectin there is a little flyer with directions and using these directions makes it easy to use different berries or fruits, and even combinations to make your own custom flavors.

I love this gooseberry jelly. It's the perfect balance of tart and sweet, and can be any color from pale golden to a rosy pink, depending on the type of berries you have. Let's get busy making jelly, shall we?


Gooseberry Jelly

4-5 lbs gooseberries
1 cup water
1 box powdered pectin
7 cups sugar

Crush or grind the gooseberries. Place in large saucepan with the water. Bring to a boil; reduce heat and simmer 10 minutes. Pour the berries into a juice bag over a large bowl. Allow the berries to drain naturally until the bag stops dripping. Gently squeeze bag to remove all juice. Measure 5 1/2 cups juice (you can add apple juice if you don't have quite 5 1/2 cups).

Prepare a boiling water bath canner, half pint jars and lids.

Put juice in large pot, stir in the pectin. Bring mixture to a full rolling boil on high heat, stirring constantly. Add the entire amount of sugar at once. Return to full rolling boil while stirring; boil one minute.

Ladle jelly into hot jars to 1/4 inch head space. Process for 10 minutes.


NOTE: This recipe has not been tested by the NCHFP. If you are not comfortable canning untested recipes, please do not use this one.

Friday, August 7, 2015

Eat The World- Shannon's Take on Spicy Asian Chicken

If you're a home food preserver like I am you are well aware that canning is not cooking, and generally speaking, you can foods that are ingredients, not composed dishes, right? There are a few exceptions, like soups and some stews, but for the most part I find myself canning a lot of vegetables, pickled foods, relish type foods, and the like. The reality is I prefer this way over a cupboard full of soups and ready to eat meals- they are not as versatile as a cupboard filled with ingredients!

With so many relish and pepper things canned many people wonder what in the world to do with these foods later. Pepper jellies are often poured over a block of cream cheese and served as a spread for crackers, or melted and uses as a baste or glaze for roasting meats. Relishes are added to sandwiches, dips and cheese plates. Hot pepper sauces and salsa add fire to all kinds of foods. Cowboy Candy, or candied jalapenos, is one of those foods so many people ask "Well, what am I supposed to do with this?"

Get the recipe for Cowboy Candy by clicking HERE.

Don't let "candy" fool you- there is a sweet note but these little jewels still pack a punch, especially the leftover juice when you've fished out all the pepper slices. This leftover liquid is an unexpected bonus- you get a slightly sticky, slightly sweet and nicely hot liquid to perk up all kinds of dishes. 


Picture from Paul Quick
So where do you get the leftover syrup? Well, a couple of ways. Often when you make a recipe like this for home canning you find you have excess brine (I always have leftover- especially when making pickles). You can pour the extra liquid from Cowboy Candy into extra canning jars and process along with the other jars for shelf stability or just pop in the fridge. Because the peppers get simmered in the brine for a few minutes before packing into jars it does have some of the heat infused already. You also will have leftover, and usually hotter, liquid left after you have fished out the sliced peppers and ate them. Save this as well! The flavor is incredible.

It's so useful. You can cook it to reduce it and get a syrupy sweet and hot drizzle or dipping sauce, a great way to jazz up purchased salad dressings. It makes a great marinade, an add-in to barbeque sauce, a great way to perk up fridge pickles or store bought pickles, and turns Asian style foods into something extra wonderful.

This is where Shannon comes in. Shannon Goudy lives in Florida and enjoys home food preserving as much as I do. She is a regular contributor in a Facebook canning group we both belong to and often posts recipes, loads of pictures and great hints- including her take on a sweet hot Asian chicken dish that you are going to LOVE. Shannon came up with this recipe and called it Triple "S" Threat Chicken- sticky, spicy and sweet- and I agree!! 


Shannon's Triple "S" Threat Chicken

Sauce:
1 1/2 cups Cowboy Candy Syrup
1 teaspoon ginger
2 teaspoons soy sauce
1/4 cup cold water
2 tablespoons cornstarch

Chicken:
4 large chicken breasts
2 cups all purpose flour
1/2 cup cornstarch
1 teaspoon ground ginger
1 teaspoon salt
1/2 teaspoon garlic powder
4 large eggs
Oil for frying (Shannon prefers peanut oil)

To make the sauce, combine the Cowboy Candy syrup, ginger and soy sauce in a medium saucepan. Mix the cold water and cornstarch together until the cornstarch is fully dissolved then add to the syrup mixture. Whisk together and cook over medium heat until thickened. Set aside.

For the chicken, start by beating the eggs in a large bowl and set aside. In a separate bowl, mix together the flour, cornstarch, ginger, garlic and salt. Set aside.

Cut the chicken into bite sized cubes. Working on small batches, dip the chicken in the egg to coat, then in the flour mixture. Fry in the hot oil until golden brown and cooked through. Drain on paper towels and keep warm until all chicken has been fried.

Toss the chicken with some of the sauce- just enough to coat, and serve over jasmine, basmati or long grain rice, and sprinkle with some Cowboy Candy. Serves 4 to 6.

Doesn't this sound KILLER? I am definitely making this as soon as I restock my Cowboy Candy stash. A side of stir fried veggies and this is better than any takeout I can imagine. 

Shannon gets her cooking chops from her hobbies- like me, she is a cookbook reader. Yep, cover to cover just like me. She, also just like me, watches cooking shows like some people watch sports, with Food Network personalities Robert Irvine, from Restaurant Impossible, Dinner Impossible, and more,  and Ree Drummond, the Pioneer Woman, among her favorites. She gets some professional kitchen experience working for her uncle- she prepares lunch every day for the entire staff of her uncle's business, about twenty people, including all the planning, shopping and budgeting.

The country lifestyle in northwest Florida is something Shannon really thrives in- stopping at farm stands for produce and local dairy products, and I'm sure all that beautiful produce is featured i many dishes from her kitchen. She really loves all things Asian- Chinese, Japanese, Thai, Indian, and those veggies are vital to amazing Asian foods. 

Besides cooking, Shannon is a big animal lover, and loves spending time wherever there is water, be it the beach, river, spring or pool!

Disclosure of Material Connection: I have not received any compensation for writing this post. I have no material connection to the brands, products, or services that I mentioned. I am disclosing this in accordance with the Federal Trade Commission's 16 CFR, Part 55: "Guides Concerning the Use of Endorsements and Testimonials in Advertising."

Tuesday, July 14, 2015

Canning Cookbook- Granny's Four Bean Salad

One thing I have learned since moving to the country is that food trends rarely make their way out here. You will never see a food truck in a small Iowa town, and probably not find butter poached anything in a small town diner. What you will find are the kinds of foods I have always called Church Cookbook Foods. That vinegar coleslaw. Broccoli salad with bacon and raisins. Seven layer salad. Chicken and noodles. Salisbury steak. Rhubarb everything.

Some of my favorite cookbooks are those "church cookbook" type books. They aren't all churches anymore. Lots of organizations put together a cookbook to celebrate a milestone year, or celebrate their history. I love collecting these gems. Reading over them years down the road is a trip down memory lane. My late mother in law made foods like those. She made seven layer salad all the time. She baked every rhubarb dessert you can imagine. She made lots of things with jello.

I can't tell you how many of these recipes ended up on the table at picnics, reunions, barbeques over the years. Pastel colored Tupperware from the 60s was the serving bowl of choice for moms and grandmothers back in my childhood. My dad worked for a small company and their office picnic was always a potluck. The boss bought the chicken or the burgers and dog, and everyone brought a side dish.  Big plastic bowls of potato salad, macaroni salad, plates of brownies and cake squares, baked beans- you name it- always lined the wooden picnic tables. 


My dad was a Baked Beans Connoisseur. I've talked about his interest in cooking, calling him the 70s version of a foodie. He bought a Rival Crockpot as soon as they hit the market and I remember him tinkering with baked beans recipes to get just that perfect sweet and spicy, gooey slow cooked bean. My grandmother was the Bean Salad Queen. I remember her great big house in Minnesota, and sitting down to dinner at the table loaded with- you guessed it- church cookbook foods, including Perfection Salad with a dollop of Spin Blend salad dressing, pea salad, always something with Cool Whip and fruit and Four Bean Salad.


Four Bean Salad is one of those great recipes that lends itself well to home canning- the dressing has plenty of vinegar to make canning the vegetables safe, much like a pickled product. The green and wax beans are cooked briefly before being tossed with the kidney and garbanzo beans, chopped onions, bell pepper and crunchy celery. The sweet and sour dressing is just like Gramma's, and just like those old church cookbooks.


Sadly, on Recipe Making Day I was unable to get garbanzo beans at my little grocery store. Darn it, I should have planned ahead. So we're actually making Three Bean Salad with double the kidney beans (4 15oz cans, drained and rinsed), but it will still be delicious.

Granny's Four Bean Salad
adapted from Ball's recipe

5 cups sliced green beans (cut into 1 inch pieces)
5 cups sliced wax beans (cut into 1 inch pieces)
2 cups cooked kidney beans (canned is fine, rinse and drain)
2 cups garbanzo beans (canned is fine, rinse and drain)
2-3 ribs celery, sliced on the bias
1 1/2 cups chopped onion
1 bell pepper, chopped
3 cups apple cider vinegar
1 1/4 cups water
2 1/2 cups sugar
1 tablespoon mustard seeds (mix of brown and yellow)
1 teaspoon celery seed
1 teaspoon kosher salt

Prepare a hot water bath canner and jars.

In a large saucepan combine the vinegar, water, sugar, salt and spices. Bring to boil, stirring to dissolve the sugar. Keep hot.

So colorful- even before the green and wax beans are added
In a large stockpot place the green and wax beans and celery. Cover with water and bring to boil. Boil for 5 minutes, then drain and toss with remaining vegetables. Pack the vegetables into hot canning jars. 


Ladle the hot pickling liquid over. Remove air bubbles, fix lids and rims and place in water bath canner. Process pints for 15 minutes.


This is a handy salad to have on the shelf. Chill, pop open a jar and serve. Easy peasy. I love having foods like this around so when I need a last minute dish, say a last minute office potluck, or friends drop in when we're getting ready to throw some dogs on the grill, one more dish added to the meal can really stretch things, and I don't have to worry about having nothing to share or serve.


This recipe has been tested for safety by Ball. 

One further word about home canned foods- if you do decide to bring any home canned food to a potluck, you should let people know it was made with home canned foods, as some people are very worried about food safety and don't eat foods canned by others. Don't be offended- they are just being proactive. I'm never offended.

Friday, July 10, 2015

Canning Cookbook- Relish Roundup

Summer garden season is in full swing in Iowa and we have the garden bounty to prove it. Tomatoes, corn, greens of all kinds, zucchini and peppers, glorious peppers. Hot, sweet and super hot- if you're like me you have an abundance of peppers and need some creative ways to preserve them. As much as we love salsa, seriously, you can only make so much before you start thinking you've lost your mind so I often make up a few relishes every year. It's a great way to use up some odd peppers I have sitting around and relish recipes are super easy to adapt to what you have on hand. They are a pickled food, so there is a little more room for varying the ingredients without worrying about having a product that shouldn't be canned. The vinegar provides the acidity you need.

This first relish recipe is a great way to use up peppers. I often reach the end of the season and have a pile of different peppers of several varieties. In this recipe you need 3 quarts of chopped peppers- the type is up to you. Bell peppers have no heat so start with them and add hot peppers to the heat level you like. A mix of colors in your peppers makes a very pretty relish in the jar too.

Go easy on the super hots!! 
NOTE: These recipes have not been tested by the NCHFP. If you are not comfortable canning untested recipes, please do not use them.

Spicy Pepper Relish

3 quarts finely chopped peppers*
2 large onions, finely chopped
2 cups apple cider vinegar
1 cup red wine vinegar
2 cups sugar
1 tablespoon salt
1 teaspoon ground black pepper

*Start with bell peppers and add hot peppers to taste. I usually use about 2 1/2 quarts bell peppers and then add the hot peppers. We grow so many super hots a recipe can get out of control hot very easily if I'm not careful.

A colorful mix of peppers makes a beautiful relish
Combine the vinegar, sugar, salt and pepper in a large stockpot. Bring to a boil, stirring to dissolve the sugar. Add the peppers and onions; return to boil and cook about 5 minutes.

Spoon the relish into half pint jars leaving 1/2 inch headspace. Wipe rims; fix lids and rims, and process in a boiling water bath canner for 10 minutes. Allow to cool overnight before testing seals and removing rings.


I wasn't always a relish lover, in fact I have spent most of my adult life convinced I hated it. Maybe it was the bizarre neon green sweet pickle relish you see at concession stands. Something turned me off, that's for sure. It wasn't until a few years ago that I bravely made radish relish and became a convert. Likewise, I started wanting relish all the time. I started coming up with reasons to make hot dogs and brats- just so I could have relish. This relish recipe was shared with me by my friend Shelly, who says this is a copycat of the famous Coney Island hot dog stand recipe.

Coney Island Relish

5 cups finely minced cucumber
3 cups finely minced onion
2 bell peppers, finely minced
1 or 2 jalapeno peppers, finely minced
1 cup finely minced celery
4 cups apple cider vinegar
3 cups sugar
2 teaspoons mustard seed
2 teaspoons celery seed
1 teaspoon ground black pepper

Heat the vinegar, sugar, seeds and pepper to boiling. Add the vegetables and simmer 20 minutes.

You can reduce the heat by removing the seeds and membranes
Pack the relish into half pint jars leaving 1/2 inch headspace. Wipe rims; fix lids and rings, and process in a boiling water bath canner for 15 minutes. Allow to cool overnight before checking seals and removing rings.

Everyone knows I love cookbooks. I have.......many. Church cookbooks especially. Many of the canning recipes in those old books are questionable by today's standards but a lot of pickle and relish recipes are great, including this Piccalilli- peppers and green tomatoes, the ultimate end-of-the-garden relish and I think you're going to love it.

Mom's Old Fashioned Piccalilli

5 cups finely chopped peppers (sweet and hot)
3 medium green tomatoes, finely chopped
1 onion, finely chopped
3 cups apple cider vinegar
1 3/4 cups sugar
1 teaspoon ground black pepper
1/4 teaspoon ground cinnamon
2 tablespoons mustard seed
pinch of cayenne pepper

In a large stockpot combine the vinegar, sugar and spices. Bring to a boil, then add the chopped vegetables and bring back to a boil. Reduce the heat and simmer for 30 minutes.

Spoon the relish into half pint jars. Wipe rims; fix lids and rings and process in boiling water bath canner for 15 minutes. Allow to cool overnight before checking seals and removing rings.

Now that ought to keep you well stocked with relish until next summer, and have a few jars to give away as gifts too. Give these a try and let me know what you think!

Sunday, June 28, 2015

Canning Cookbook- Triple Cherry Jam

The other night the Little Lake House, and a whole lot of others in Iowa, were rocked by storm after storm after storm. All day long, starting in the early morning, the rain and thunder and lightning just kept coming. Tornado sirens sounded in the nearby town of Dexter and like it always does, the satellite tv signal was knocked out by the storm. Even at nearly 3 a.m. the storm raged on. In the morning much of Iowa awoke to flooded roads, rivers bursting out of their banks, basements turned into indoor pools, and storm debris all over.

photo courtesy of Chris Winget
One casualty of the storm was a cherry tree at the aquaponics farm a few miles away. Checking my email this morning I was surprised to see Cherries!! in the subject line. I had no idea they even had fruit trees! The tree's misfortune was my good luck, because I scored a big bag of fresh sour cherries for a mere $3.00. While chatting with the farm owner, he hinted that this is the perfect amount of cherries for a pie. Good idea, although I already had plans for these guys.


It's getting to be canning season around here again. The pile of empty jars in the storage room is growing and the cupboards are starting to look a little bit like Old Mother Hubbard's cupboards. The tomatoes and tomato jam are long gone. So is the salsa, and many of the jams. A few odd pickles remain, a few pints of salsa verde, several jars of green beans, and a decent stash of apple butter. The cherry jam I made before has been gone for months and I've been waiting patiently for cherry season so I can replenish my stash. As you can imagine, I wasn't too heartbroken to hear about the rush sale on cherries at the farm (although losing the tree means there will be a lot fewer cherries next year) because I got a great head start on pitting cherries tonight. Those have been safely stashed in the fridge, and tomorrow I'll grab some sweet juicy Bing cherries, and my very favorite, Rainier cherries, to add to the pot. They will add a new dimension of cherry deliciousness to my jam and beautiful color too.

photo courtesy of Chris Winget
Triple Cherry Jam

2 cups chopped pitted sour cherries
1 cup pitted chopped Bing cherries
1 cup pitted chopped Rainier cherries
1/4 cup lemon juice
1 box powdered pectin
5 cups sugar

Pit and chop the cherries. I like to use a food processor to chop the cherries. Just add the pitted cherries to the workbowl and pulse several times to desired size. I like to keep some larger chunks of fruit in the jam so I only pulse two or three times. Measure 4 cups fruit. Place in large heavy stockpot with the lemon juice and pectin.

Sour cherries, pitted and ready to go.
Bing cherries and Rainier cherries
Measure the sugar and set aside.

Place the stockpot over medium high heat and bring to a full rolling boil, stirring constantly. Add the sugar all at once. Return to boil, stirring the entire time, and boil for one minute. Remove from heat and skim foam.

Ladle the hot jam into prepared canning jars to 1/4 inch headspace. Fix lids and rings. Process in a boiling water bath canner for 10 minutes. Let jars cool undisturbed overnight before removing the rings and checking seals.

I had enough cherries to make a double batch BUT you should never double a batch of jam or jelly. You might end up with a jam that doesn't set properly. Make two batches instead. You don't even have to wash the stockpot between batches, just add the fruit and cook the next batch. Each batch makes about 8 8-oz jelly jars.


Next up on the agenda? Popping an English muffin in the toaster, slathering that bad boy with real butter and adding a nice big spoonful of this luscious cherry jam. It's also really good served with a creamy cheese as part of a cheese plate, spooned onto a slice of cheesecake or even as part of the PB&J.

NOTE: This recipe has not been tested by the NCHFP. If you are not comfortable canning untested recipes, please do not use this one. Having said that, cherry jam is a basic recipe and this one differs from tested recipes only in the fact that there is more than one type of cherry in the mixture. Acidity is not affected.